Sunday, June 26, 2011

Bubble Mountains on Aluminum Foil

This week we've been exploring bubbles. 

We practiced different means of making bubbles, used various tools, and made bubble prints indoors and out. But by Friday, the bubble table was getting ignored. Sometimes, all it takes is one small addition to completely change the experience. 

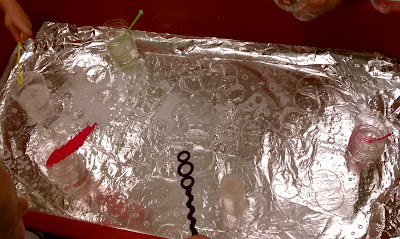
In this case, we added aluminum foil to the bottom of the sensory table...
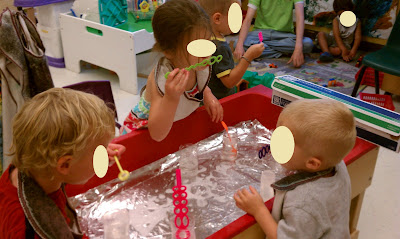
...along with a thin layer of bubble solution (to help the bubbles stick), cups filled with bubble solution, and bubble wands. Some of the cups are the bottom halves of the plastic water bottles we used to make the bubble snake makers.
The shiny aluminum foil added a new level to the sensory experience.

They dipped their wands in the bubble solution and blew bubbles down into the table.
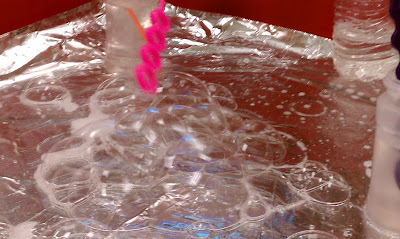
The bubbles stuck to the aluminum foil and attracted each other to make little bubble mountains.
How's that for science? I originally tried it with wax paper, but the wax paper absorbed the bubble solution, and was ineffective. The aluminum foil worked beautifully.
Because the wands (and little hands) were coated in the bubble solution, they bubbles did not pop when they touched them


Brooklynn tried to pop a bubble, only to find that her finger sunk right through.
Of course, the little containers of bubble solution were dumped out spilled, depleting our supplies of bubble juice. So I brought out the rest of the wands and our plastic bottle bubble snake makers.

What new elements do you like to add to you sensory table?

Happy playing!

Bubble prints on big paper

It's bubble week in our classroom. We practiced blowing bubbles at the sensory table, recycled soda and water bottles to create bubble snake-makers, and we also made bubble prints.


It's one of those "oldie-but-goodie" activities, so I couldn't pass it up. First we made individual bubble prints inside the classroom. All you need is paper, straws, plastic cups, bubble solution (1 cup of Dawn dish soap and 3 cups of water), and liquid water colors (you may also use food coloring).

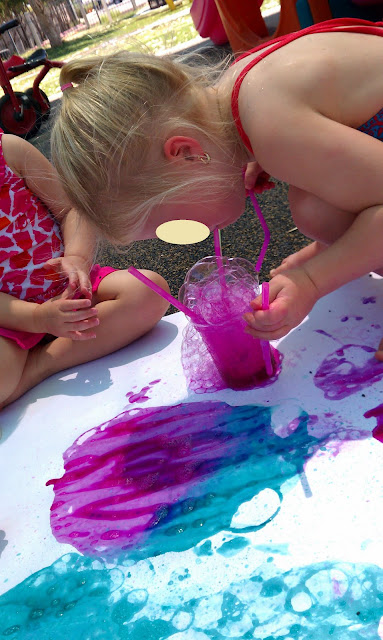
We still had plenty of the colored bubble solution left, so we cut a large piece of butcher paper, and brought the bubble blowing outside!

This is completely process oriented art. There is no end product in mind...we blow colored bubbles just for the sake of blowing bubbles and watching the colors mix.
I cut a small snip near the top of each straw to keep the bubbles from being inhaled.
Very few "prints" are actually made, but that's okay. Its about the process, not the product!
This activity is great for building language, social and emotional skills (taking turns and sharing). It's also an enriching sensory experience.
Did you know that we have a special spot in our brain for sensory experiences? Once you experience something with your senses, you will never forget it! Not sure?
Close your eyes and remember the sound of your mother's voice, the taste of a penny, the feel of warm soap and water, and the smell of your child-hood home. Could you hear it? Taste it? Feel it? Smell it?
That's why providing sensory experiences is so important for young children. Now is the time that they are building an understanding of how the world works and what the world has to offer.
Now is the time that children learn that soap makes water feel slippery, and can cause bubbles when you blow in it with a straw. Bubbles are used to clean things like your hands, your body, your hair, your car, and your floors.
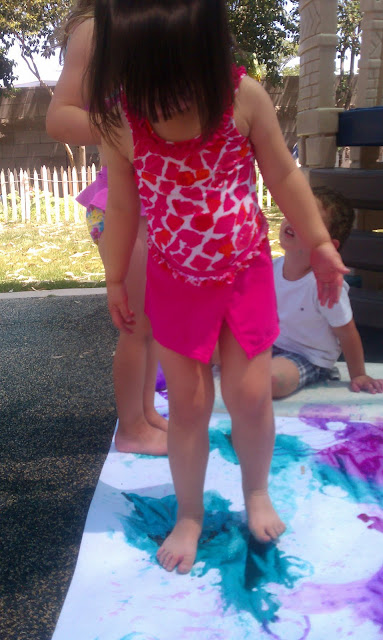
Eventually, the bubbles got boring, and the straws became the focus of exploration.

 And so did feet.

This is my favorite shot of the day!
Happy playing! 

Linked to:


Link Party Thursdays

Tree block and logs--oh my!

I drove into work just like any other day, and noticed that the four parking spaces were coned off. A little annoyed, I wondered what the deal was, but didn't have to wait long to find out. Our landscaping/ maintenance man was cutting down three, dead trees. At lunch time, I passed by the four parking spaces, and stared in wonder at all the new loose parts for our playground! 

Technically, no one knew they would be, but I had already started divvying up the good branches from the bad before I realized I would need to ask somebody if it was okay.  I called my boss, and got the "okay," and solicited the help of a toddler (my son), and two daddies who happened to be passing by.

I'm sure I looked like a crazy person--stealing logs and large branches from the parking lot and sneaking them onto the playground after work! Parents driving by to pick up their kids slowed down and openly gawked. :D

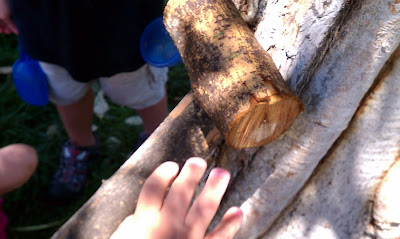
The next day, I worked my charm on the maintenance man (Mr. Casm), and asked him to cut some of the branches into blocks. He agreed (I must be more charming than I thought!), and we now have natural balance beams on both play grounds, tree blocks, and tree cookies! 
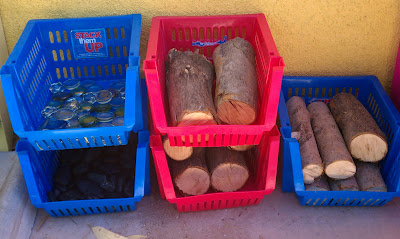
He only cut up two branches so far (I had to agree to wait for him to finish his intended job of cutting down the trees and clearing out the mess first), and I am keeping them in stack-able baskets for easy access.
The kids helped me fill the baskets with loose parts like twigs and leaves.

I asked them how we could make a house for bugs...
They got right to work!

They made some pools...and grassy soup to feed them.
The house collapsed a few times, but each time it presented a new problem to solve: how to build a structurally sound home for the bugs?
"The bugs need a slide."

This is the top of the slide.
"It's a water slide!"
The finished bug house

It's a duplex.

The stairs...so the bugs can climb up to the top of the water slide. :)
 And later in the afternoon, I brought two of our balancing logs to the other side of the playground.
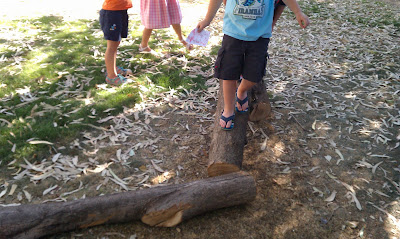
...where they were an instant hit!

They took turns naturally, and made up rules like, "No stopping," and "Don't fall in the water!"

I had a huge smile on my face the whole day! FREE outdoor blocks? FREE loose parts? FREE balance beams?! That's a good day for a preschool!

Happy playing!


Saturday, June 25, 2011

Plastic bottle bubble makers

As much as I love taking pictures and blogging, I love to read other blogs more. 
I am obsessed. 
Addicted. 
I read blogs on my half-hour lunch break! 
I love it! 

That being said, it should be no surprise that this next idea came from blogging. Child Central Station posted about their home-made plastic bottle bubble makers, and I had to give it a try. 

The prep was easy. Drink soda and water. Save the bottles. After you rinse them out, cut them in half. I used a long bread knife, and it took me about two minutes to cut through them all. You need the top half of the bottles for the bubble makers, a piece of cloth, and a rubber band.

Instead of cloth, I reused packaging netting from food and toy bags. I never throw anything away, I tell you!
It's that simple! 
I filled the sensory table with a thin layer of bubble solution, bubble wands, and our bubble makers.
They experimented with the best way to blow...some found out pretty quickly that if you put your mouth on the opening, it doesn't taste very good!
It works much better if you blow through the hole from a small distance.
Rodney stuck with it for the entire duration of free play time.
I love the concentration I see going on here as he experiments with the best way to blow.
 

Success!
 Happy playing!

I Can Teach My Child

Related Posts Plugin for WordPress, Blogger...